This journey outlines how an auditor reviews and verifies VKYC sessions using the Auditor Dashboard.Documentation Index
Fetch the complete documentation index at: https://cashfreepayments-d00050e9-handbook-faq-creation.mintlify.app/llms.txt
Use this file to discover all available pages before exploring further.
Log in to the Auditor Dashboard
- Enter your registered email address.
- Enter the one-time password (OTP) sent to your email.
- After signing in, the dashboard home screen appears.
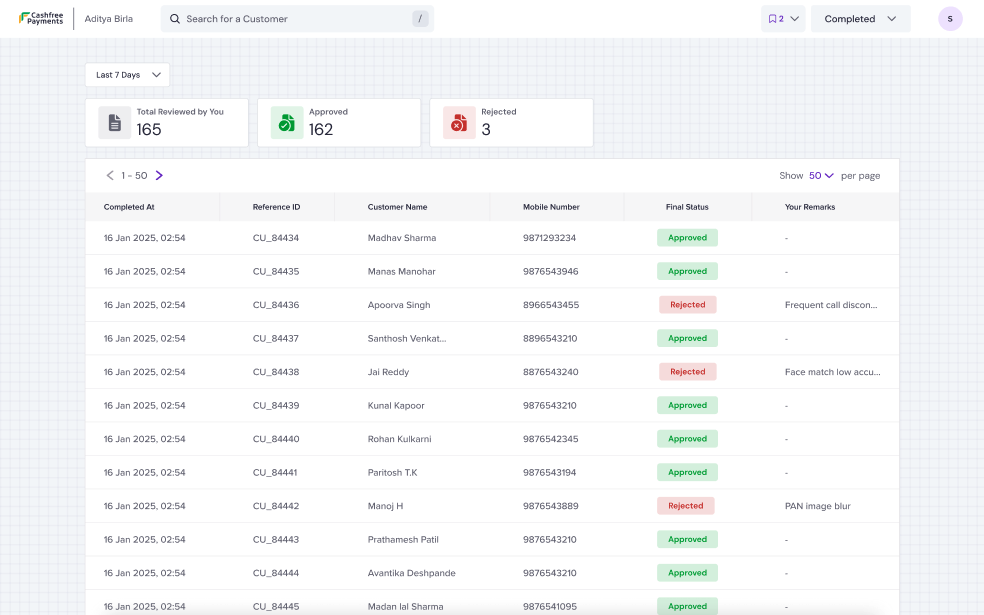
View dashboard summary
- On the home screen, view the session summary panel showing:
- Total sessions reviewed
- Sessions approved
- Sessions rejected
- Use the date range filter to update the data.
- Scroll down to view the session table. The table displays the following columns:
- Completed at
- Reference ID
- Customer name
- Mobile number
- Final status
- Your remarks
- Use the pagination controls to navigate between records and adjust the number of sessions displayed per page.
Filter sessions
- In the top-right corner, open the filter drop-down.
- Select a session type to view:
- Pending
- Approved
- Rejected
Search and select a session
- Use the search bar to find a session by Mobile number.
- Click a session row to open the review screen.
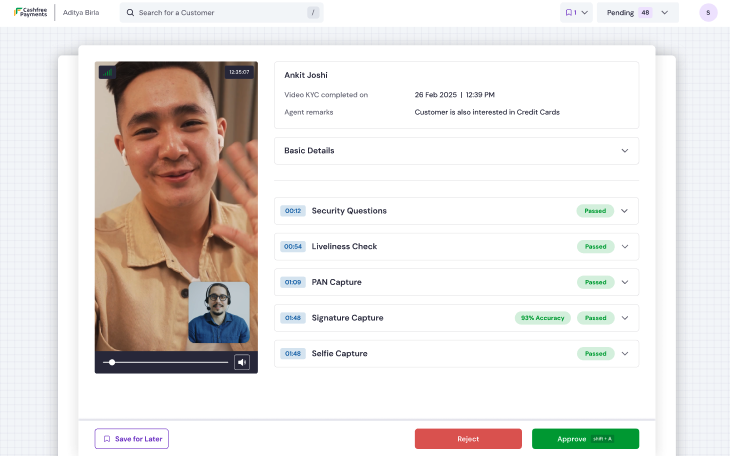
Review session details
- View the recorded video, submitted documents, and system-generated results.
- Expand each section to verify:
- OCR results
- Face match accuracy
- Captured location
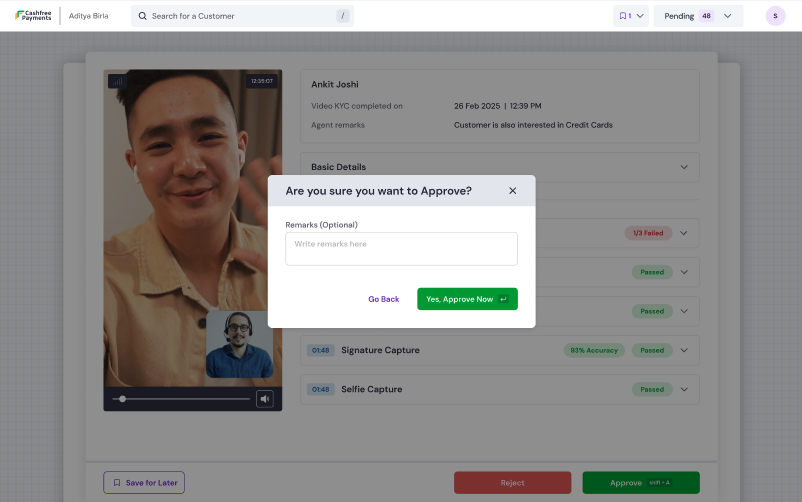
Add remarks and take action
- Enter your comments in the Remarks field.
- Do one of the following:
- Select Approve to mark the session as valid.
- Select Reject to mark the session as invalid.
- If rejecting, choose a reason from the drop-down list.