The Vendor Dashboard is a dedicated dashboard for vendors to view their transactions, settlements, and reports. Vendors receive an invitation and can access the dashboard only after you grant them access.Documentation Index
Fetch the complete documentation index at: https://cashfreepayments-d00050e9-handbook-faq-creation.mintlify.app/llms.txt
Use this file to discover all available pages before exploring further.
Accessing the vendor dashboard
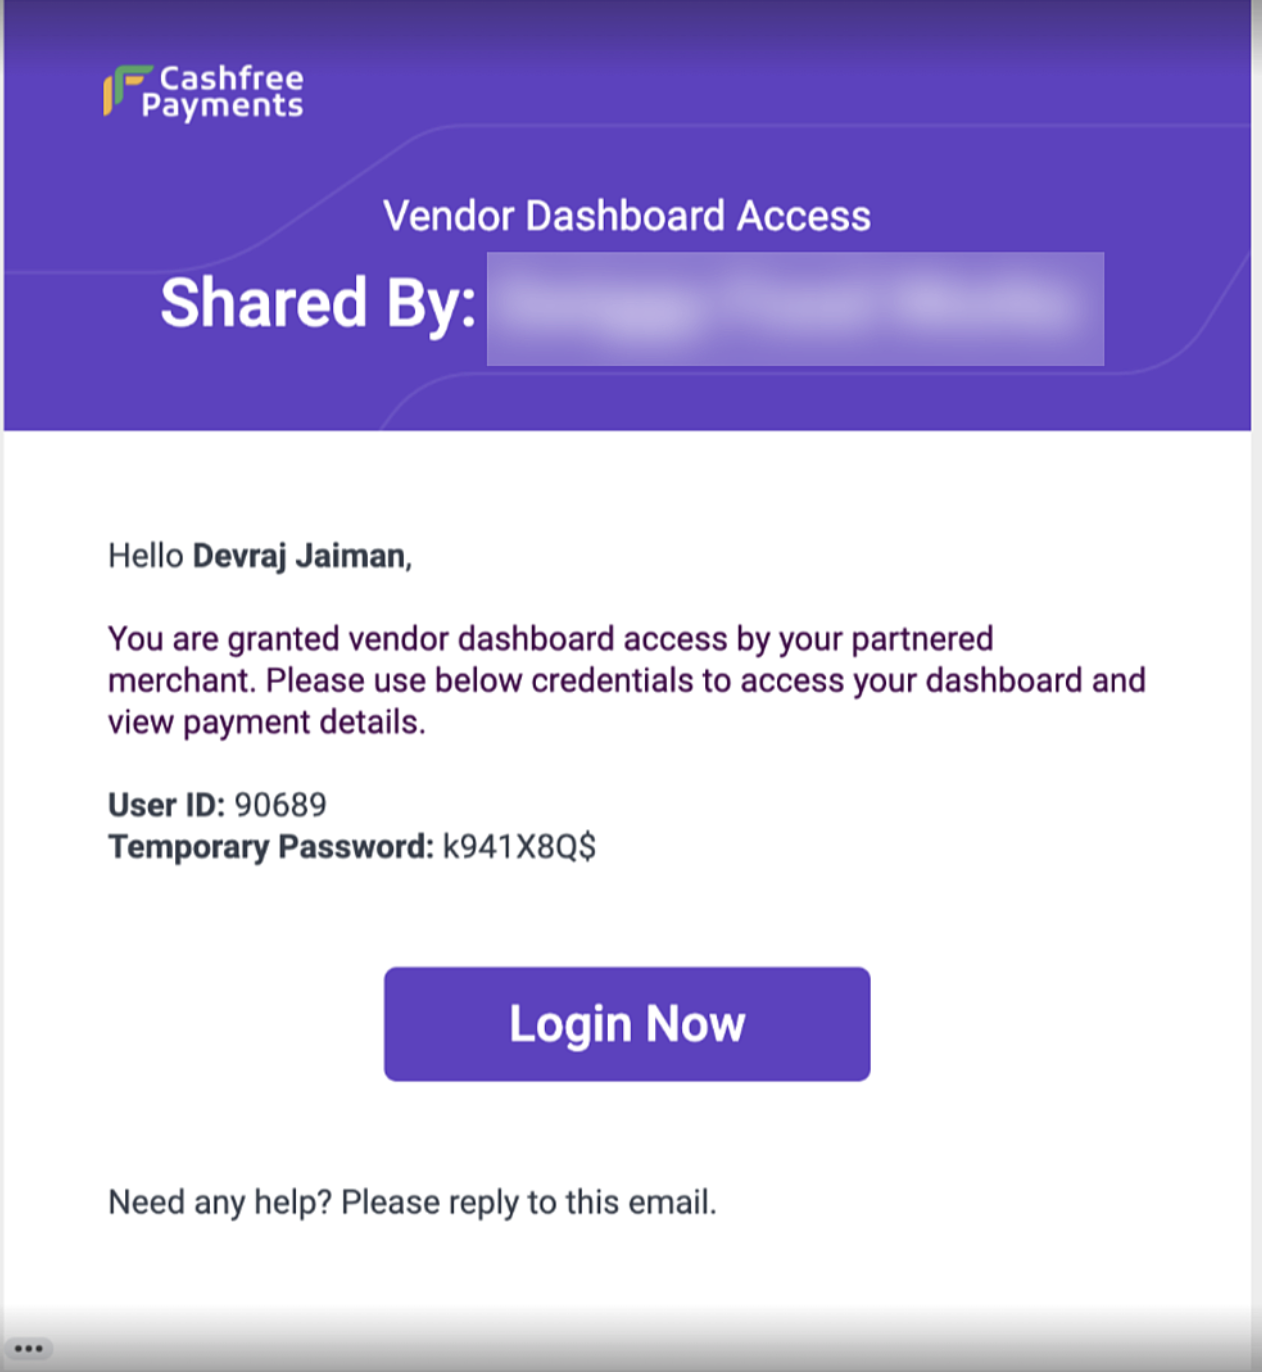
Below are the steps to access the vendor dashboard for the first time:- Activate the vendor dashboard feature by requesting your account manager.
- Grant access to the required vendor through the merchant dashboard or APIs.
- An automated email is sent to the vendor’s registered email ID.
- The vendor can reset their password and log in using the new credentials.
Summary
Once the vendor logs in to the vendor dashboard, they can view the Summary tab. This tab displays:- Recent settlements
- Upcoming settlements
- Total transactions
- Total refunds
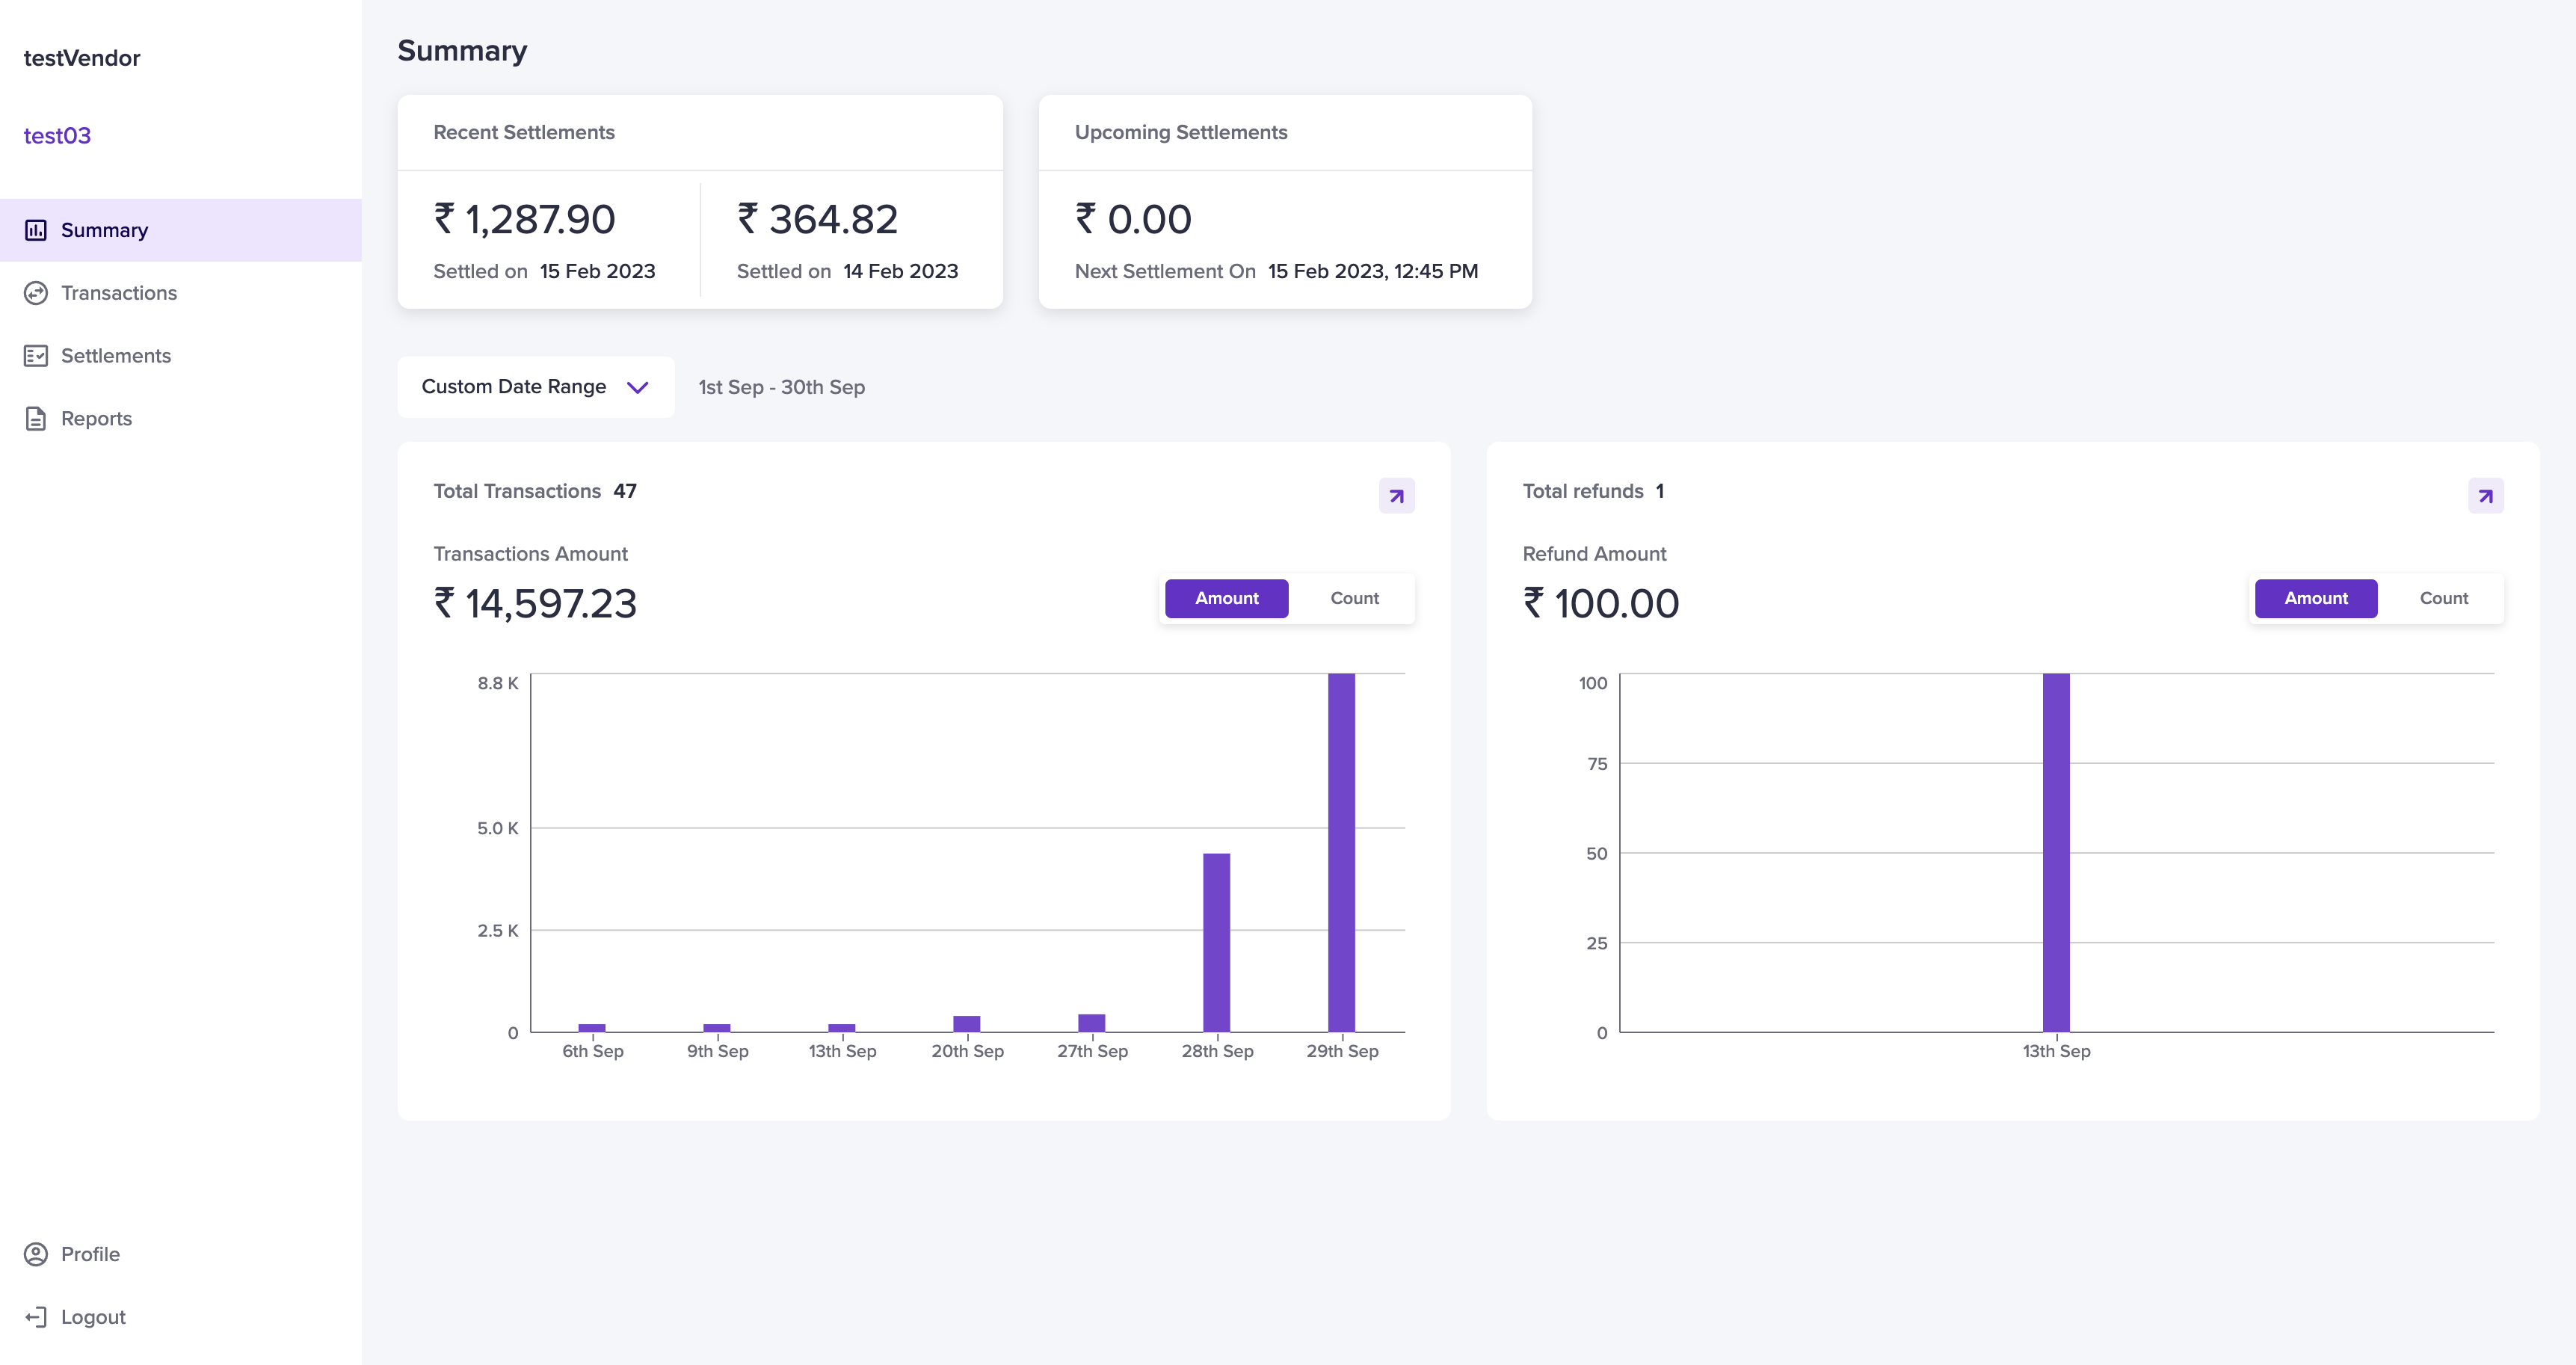
Total Transactions
The Total Transactions section displays:- The transaction count
- The total transaction amount for the selected period
Total Refunds
The Total Refunds section displays:- The refund count
- The total refund amount for the selected period
Profile
The Profile section displays vendor details. To access it, navigate to Vendor Dashboard > Profile. The Profile section is divided into three categories: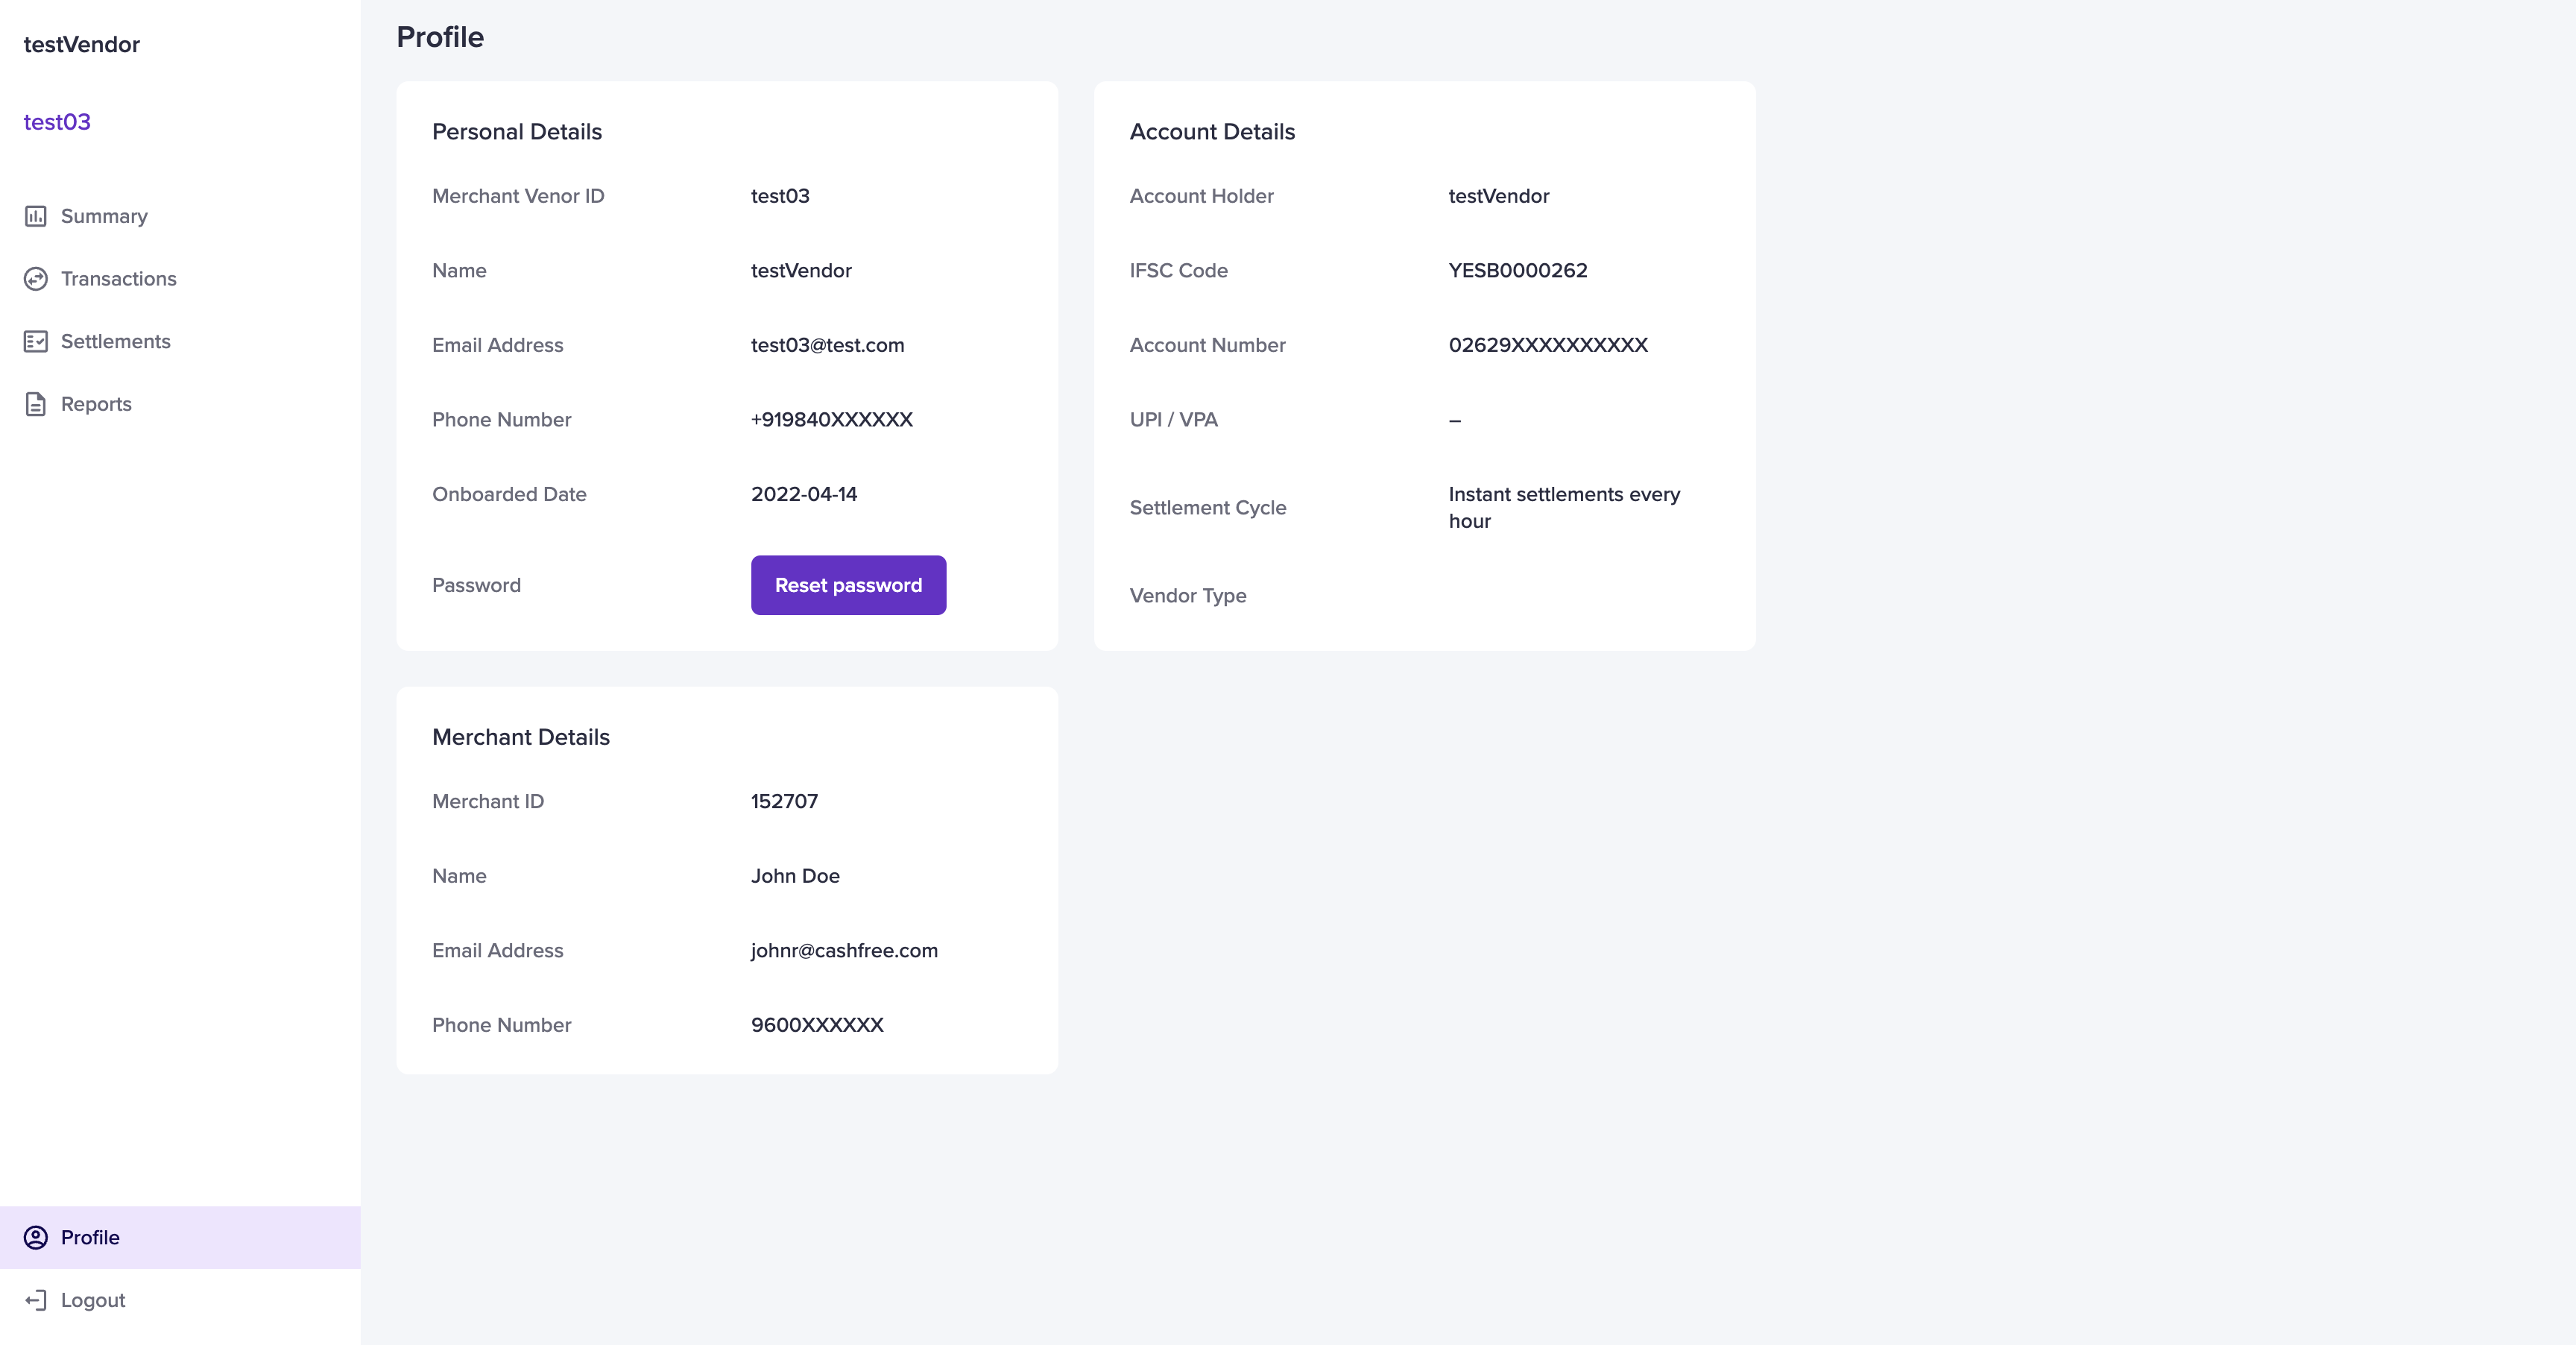
Personal Details
The Personal Details section includes:- Merchant Vendor ID – Unique vendor ID
- Name – Vendor’s full name
- Email Address – Vendor’s registered email
- Phone Number – Vendor’s contact number
- Onboarded Date – Date the vendor was onboarded
- Password – Vendor’s login password
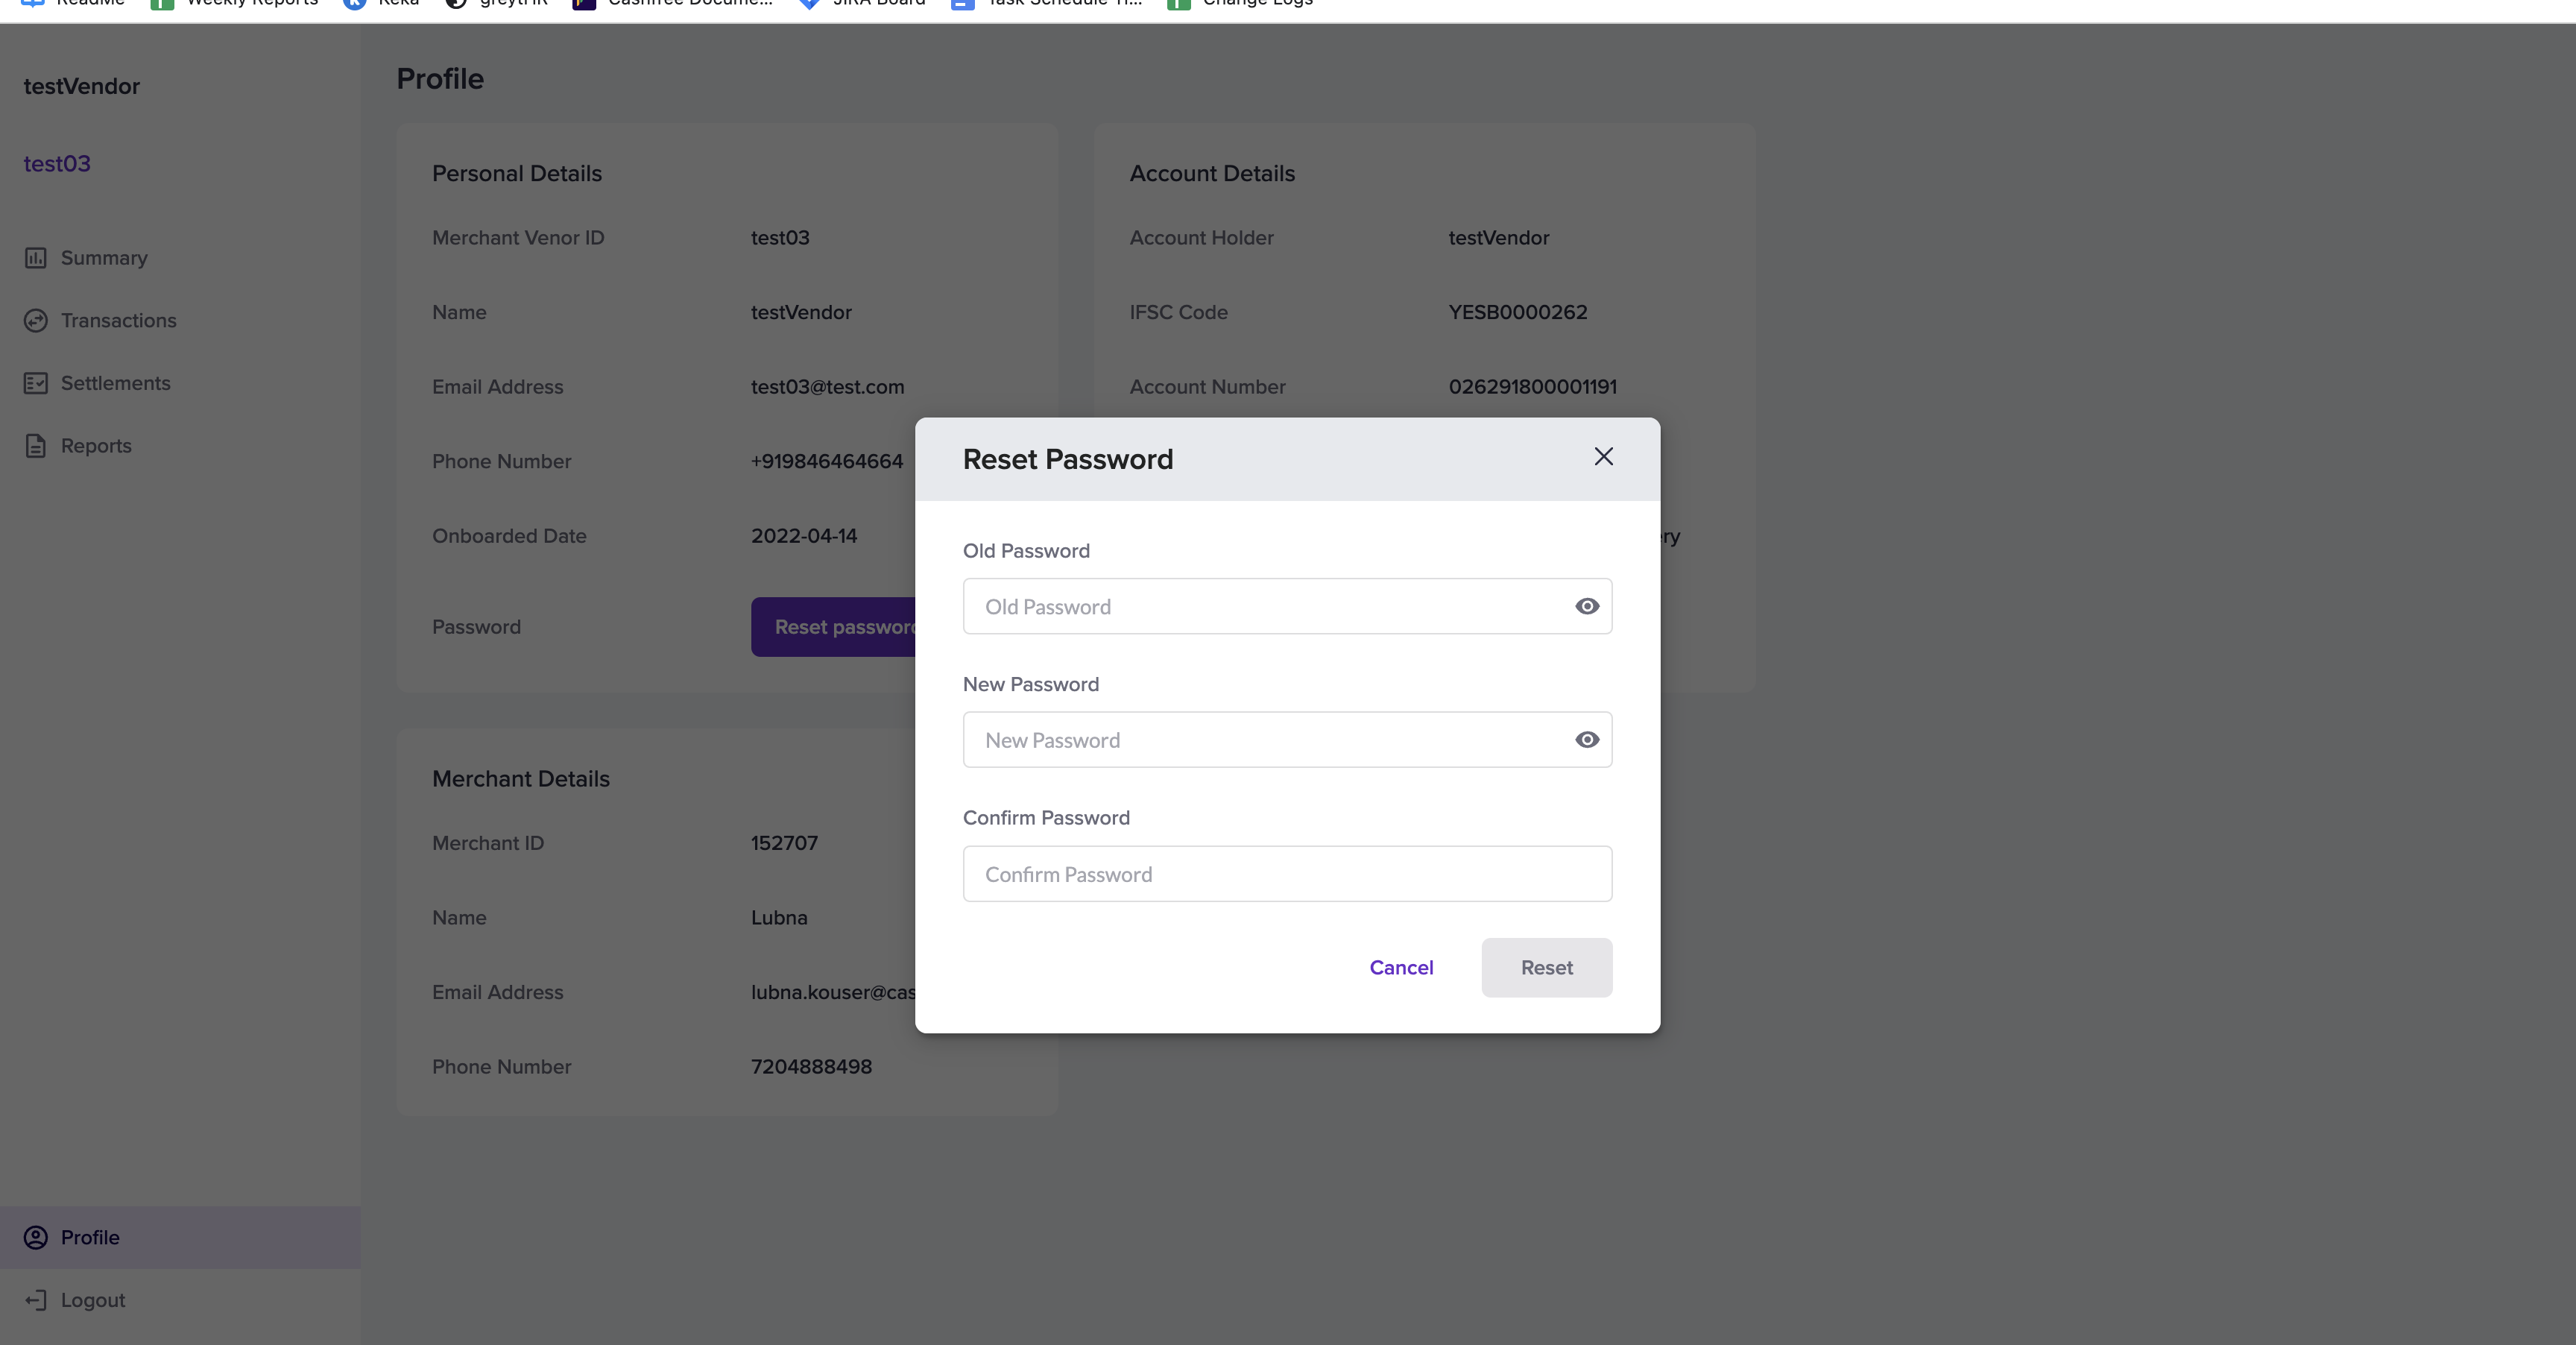
Resetting Password
Vendors can reset their password by:- Clicking Reset Password
- Entering the old and new passwords
- Clicking Reset
If the email is not received, please clear the cache and try again in incognito mode.
Account Details
The Account Details section includes:- Account Holder – Name of the account holder
- IFSC Code – Bank branch IFSC code
- Account Number – Vendor’s bank account number
- UPI / VPA – Vendor’s UPI ID
- Settlement Cycle – Configured settlement schedule
- Vendor Type – Individual or Business
Merchant Details
The Merchant Details section includes:- Merchant ID
- Name – Merchant’s name
- Email Address – Merchant’s registered email ID
- Phone Number – Merchant’s contact number