Cashfree’s 1-Click Onboarding enables businesses to simplify user onboarding and consent management by integrating with Web, Android, or iOS applications. The SDK removes the need for fragmented forms, multiple integrations, and complex compliance processes. With a mobile number and explicit user consent, it retrieves verified personal details, address information, financial data, and more, enabling form pre-filling and reducing drop-offs by up to 40%. It uses alternative data sources and minimises manual input to support a seamless user experience. This approach helps improve conversion rates, maintain compliance, and reduce time to go live. The solution is fully compliant with the Digital Personal Data Protection Act (DPDPA) and manages user consent securely and transparently.Documentation Index
Fetch the complete documentation index at: https://cashfreepayments-d00050e9-handbook-faq-creation.mintlify.app/llms.txt
Use this file to discover all available pages before exploring further.
Why choose Cashfree
The following are the key reasons to choose Cashfree:- Improve conversions by over 30%: Reduce manual entry and friction by pre-filling forms with verified user data from over 15 sources, including PAN, masked Aadhaar, address, credit score, and more.
- Ensure 100% DPDPA compliance: Stay compliant with India’s data protection laws using OTP-based, explicit consent built into the flow.
- Accelerate integration: Go live in less time with SDK, requiring only a few lines of code.
- Optimise user experience: Replace long, multi-screen forms with a single intuitive flow—reducing onboarding time by up to 80% with just a mobile number.
Use cases
The following are key use cases for 1-Click Onboarding:| Business type | Use case |
|---|---|
| Fintech and lending | Auto fetch fields like PAN, date of birth, gender, and address to accelerate KYC processing |
| Banking | Reduce manual form entry by pre-filling key details for seamless eKYC |
| Insurance | Pre-fill proposal and policy forms with verified data to fast-track onboarding |
1-Click Onboarding workflow
Integrate the SDK
Choose and integrate one of the following SDKs into your application:
- Web SDK – Embed the onboarding flow into your website.
- Mobile SDK (Android and iOS) – Embed the onboarding flow into your Android or iOS application.
Create a brand-customised template
Configure a brand-customised onboarding template in the Merchant Dashboard.To set up your template, follow the instructions in the Creating Template.
Initiate onboarding
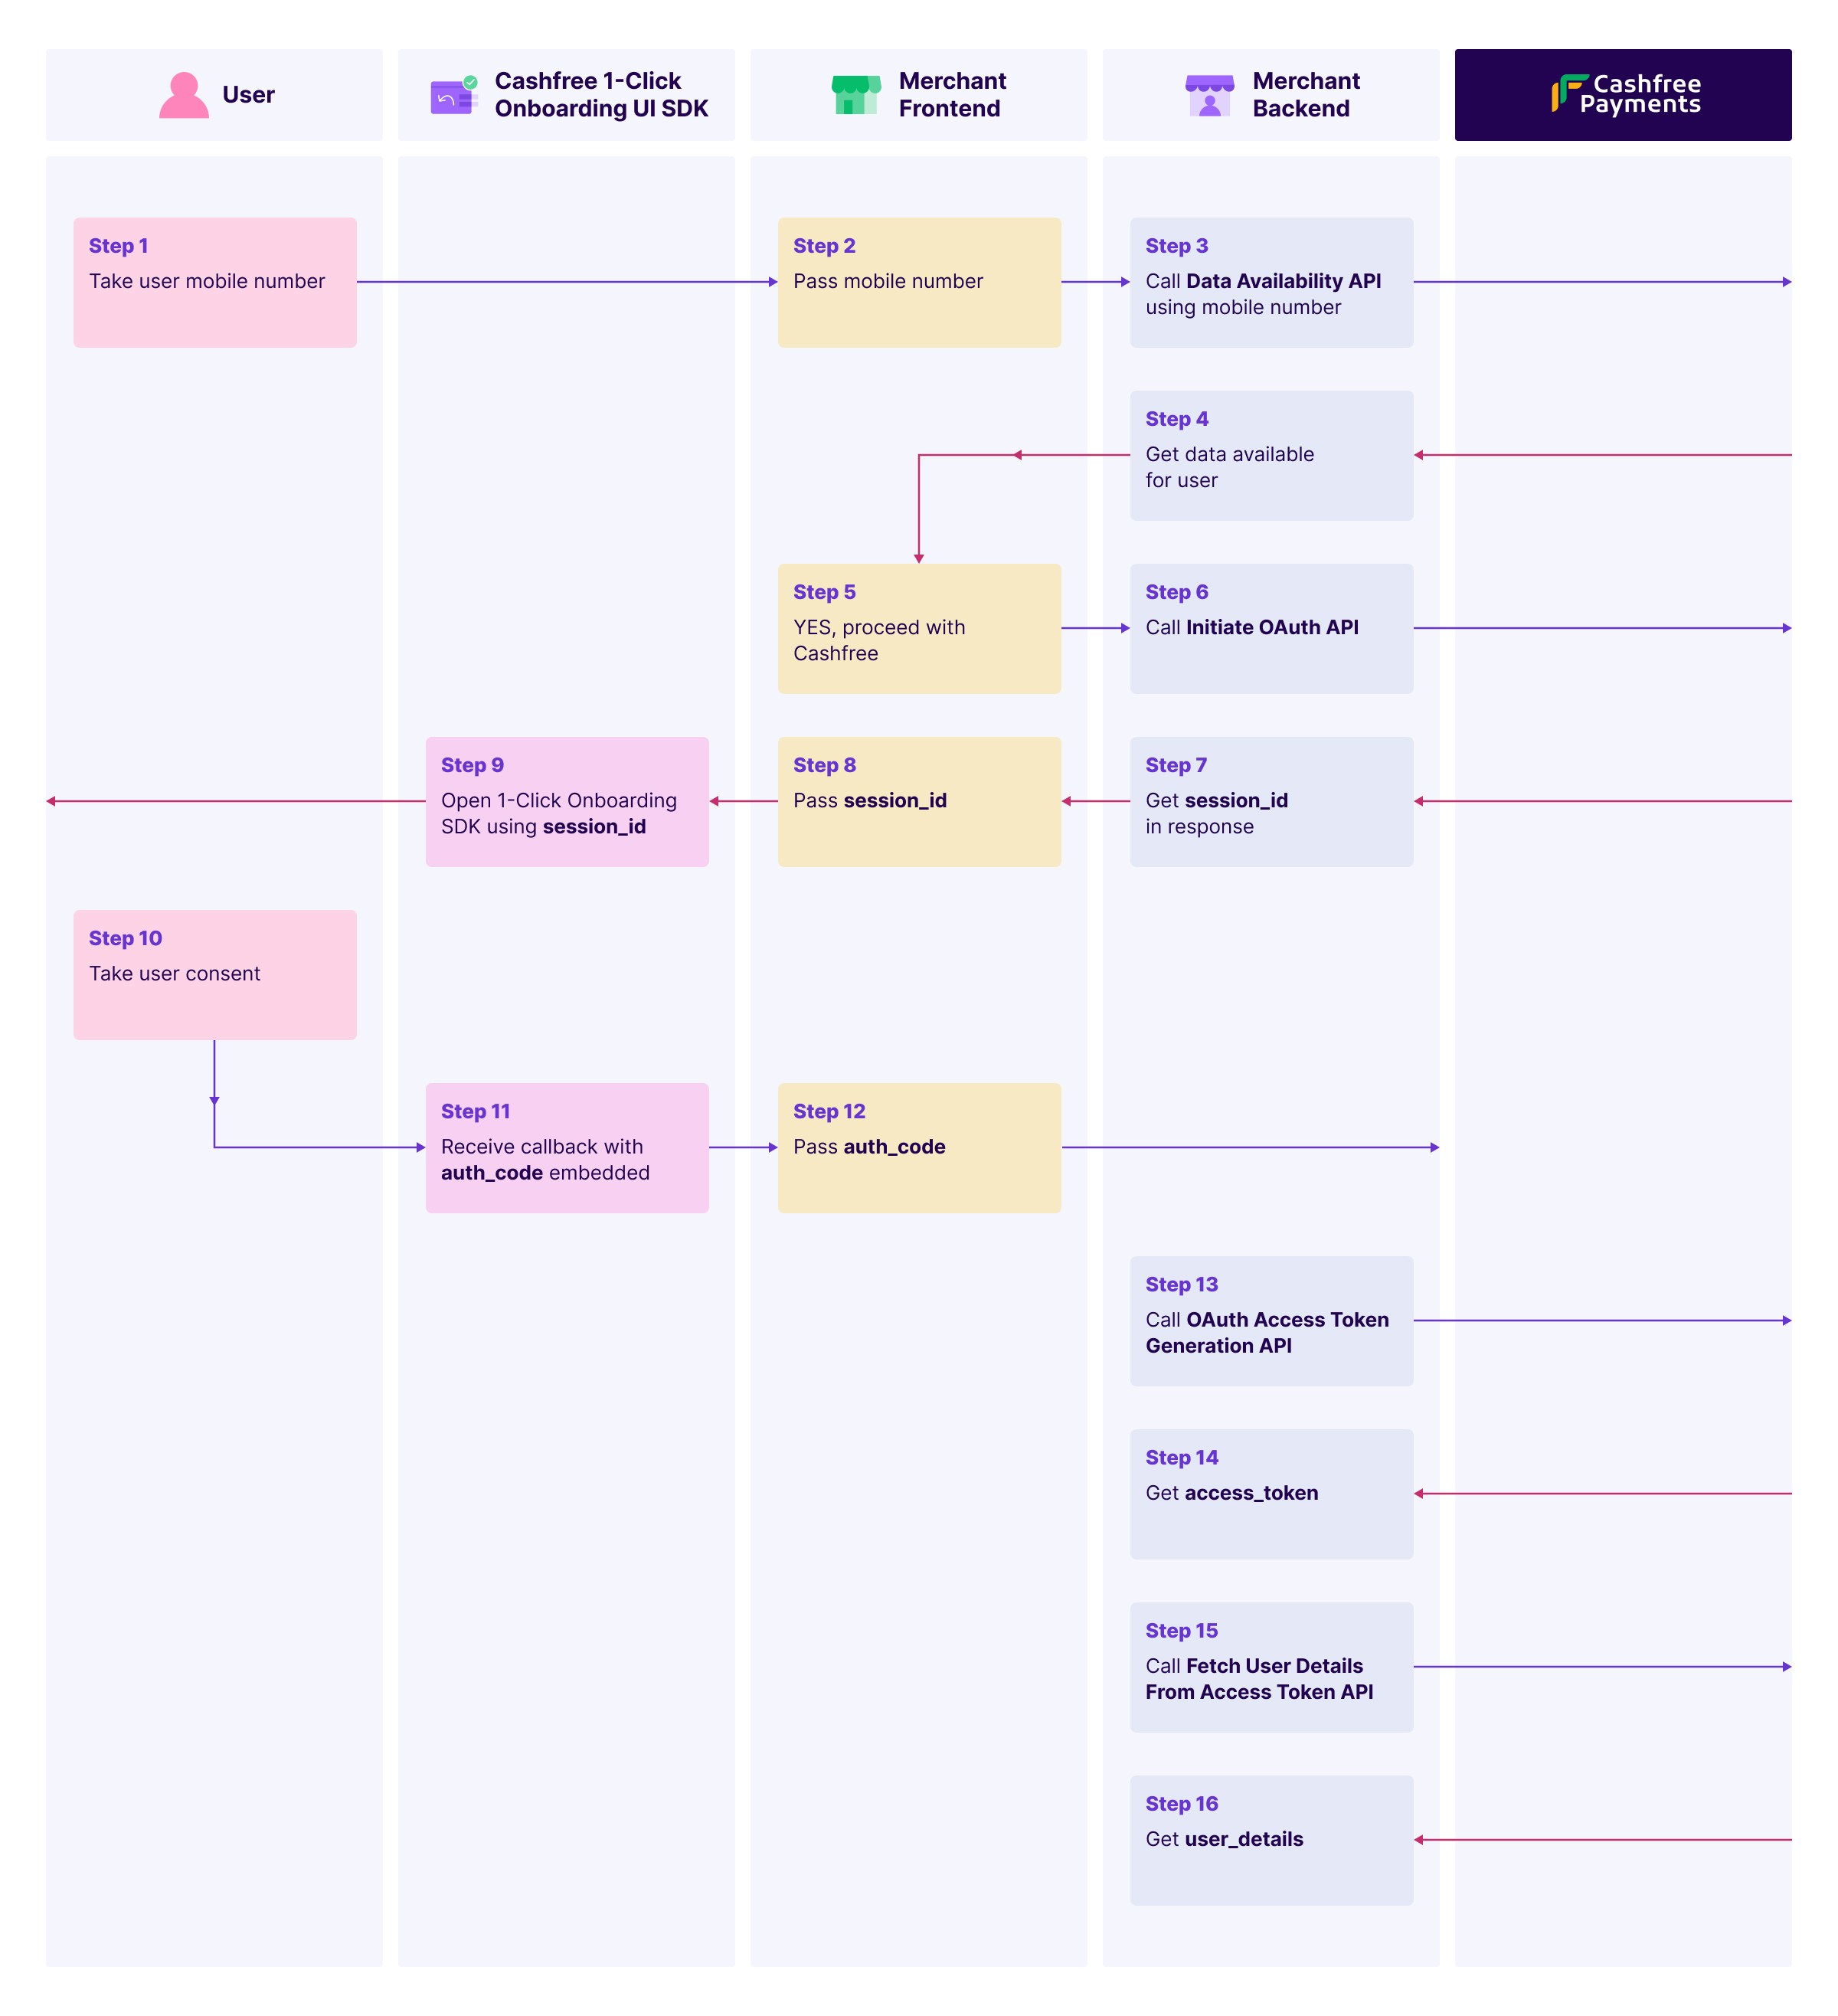
Collect the user’s mobile number and trigger the 1-Click Onboarding flow using the API or SDK.
Verify data availability
Use the Data Availability API to check if user data is available for the given mobile number.This step is mandatory. Based on availability, either display Cashfree’s consent screen or continue with the regular onboarding flow.
Initiate OAuth
Call the Initiate OAuth API with the mobile number to obtain a
session_id required to open the SDK.Collect user consent
Launch the SDK using the
session_id.The SDK will present an OTP-based consent screen for the user to approve data access.Once consent is granted, the SDK returns an auth_code via callback.Generate an access token
Use the OAuth Access Token Generation API to exchange the
auth_code for an access token.The access token is valid for one hour.Retrieve user details
Use the access token with the Fetch User Details API to retrieve verified user data, including:
- Personal details
- Address
- PAN
- And more
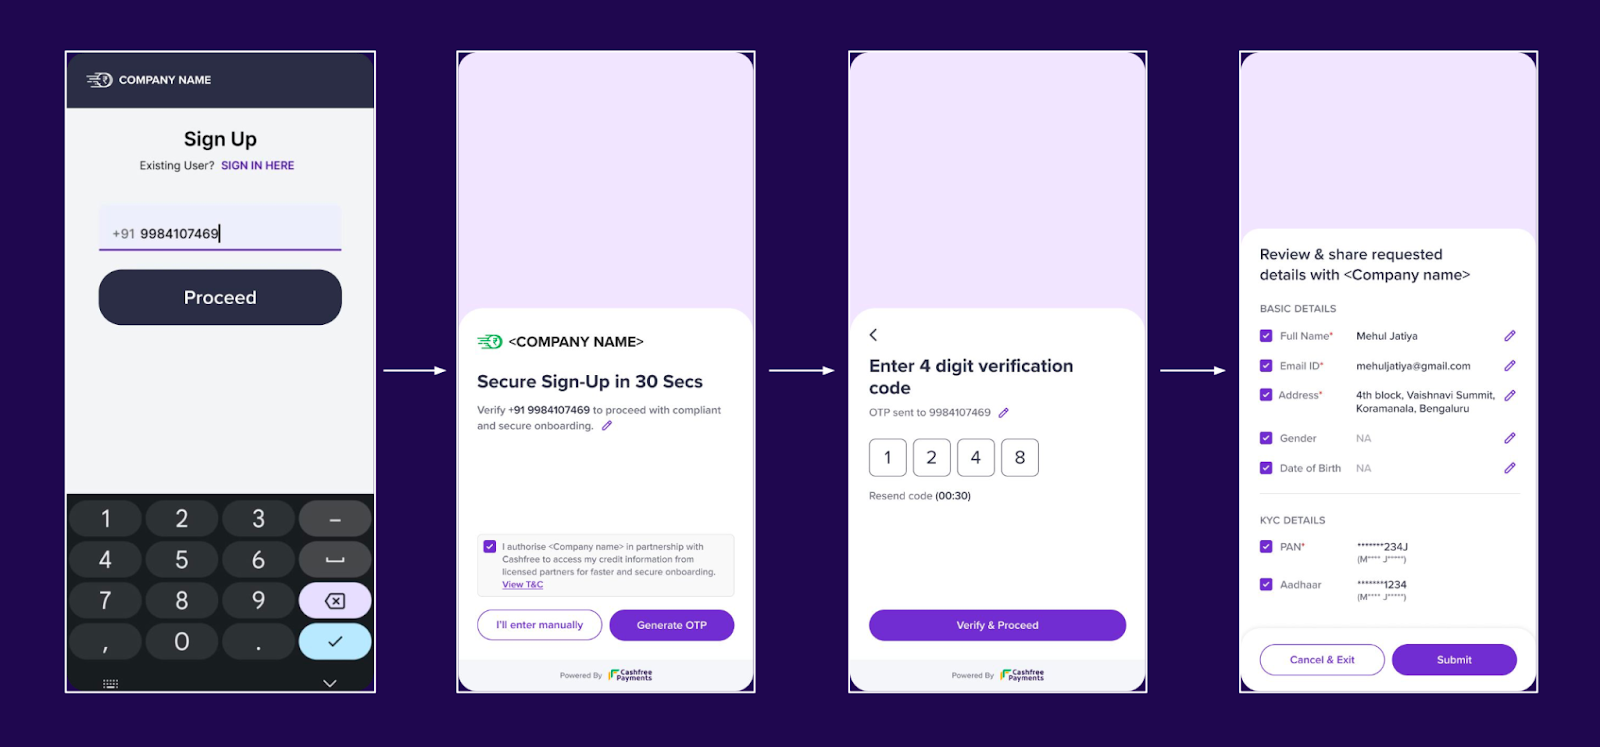
End user flow
The following steps outline the user experience during the 1-Click Onboarding process:- Enter mobile number and select Proceed.
- Review and accept the terms and conditions to continue.
- Enter the OTP received on your mobile number to complete verification.
- Review the requested data and select Submit to share the details with the merchant.